Red Velvet Snowball Cookies with White Chocolate Filling Recipe
Introduction
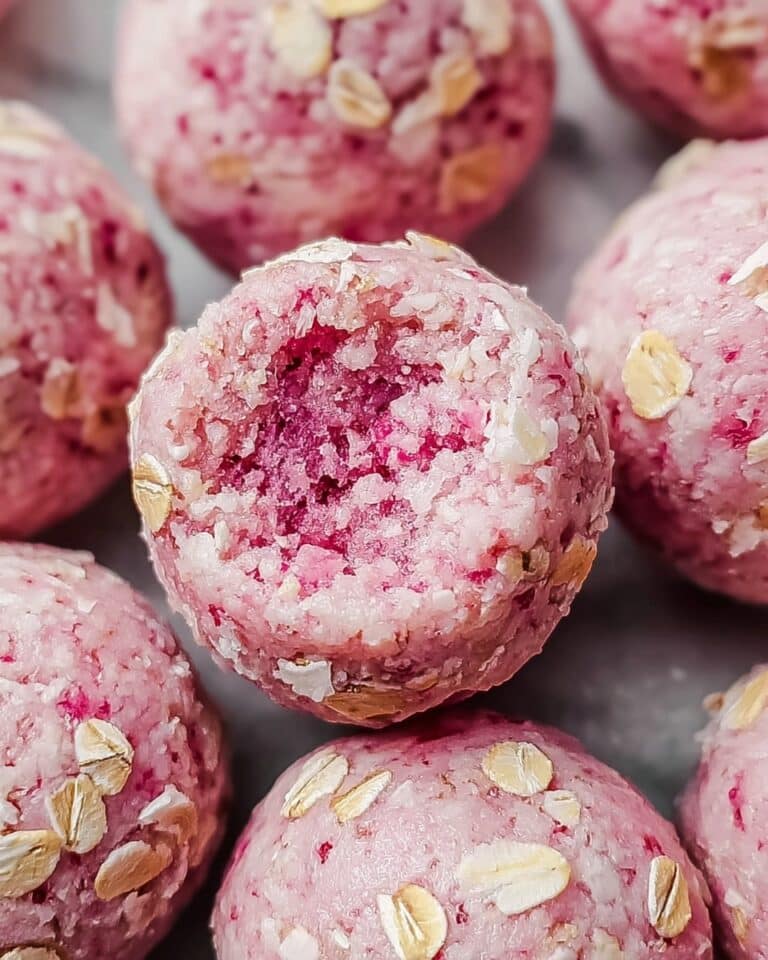
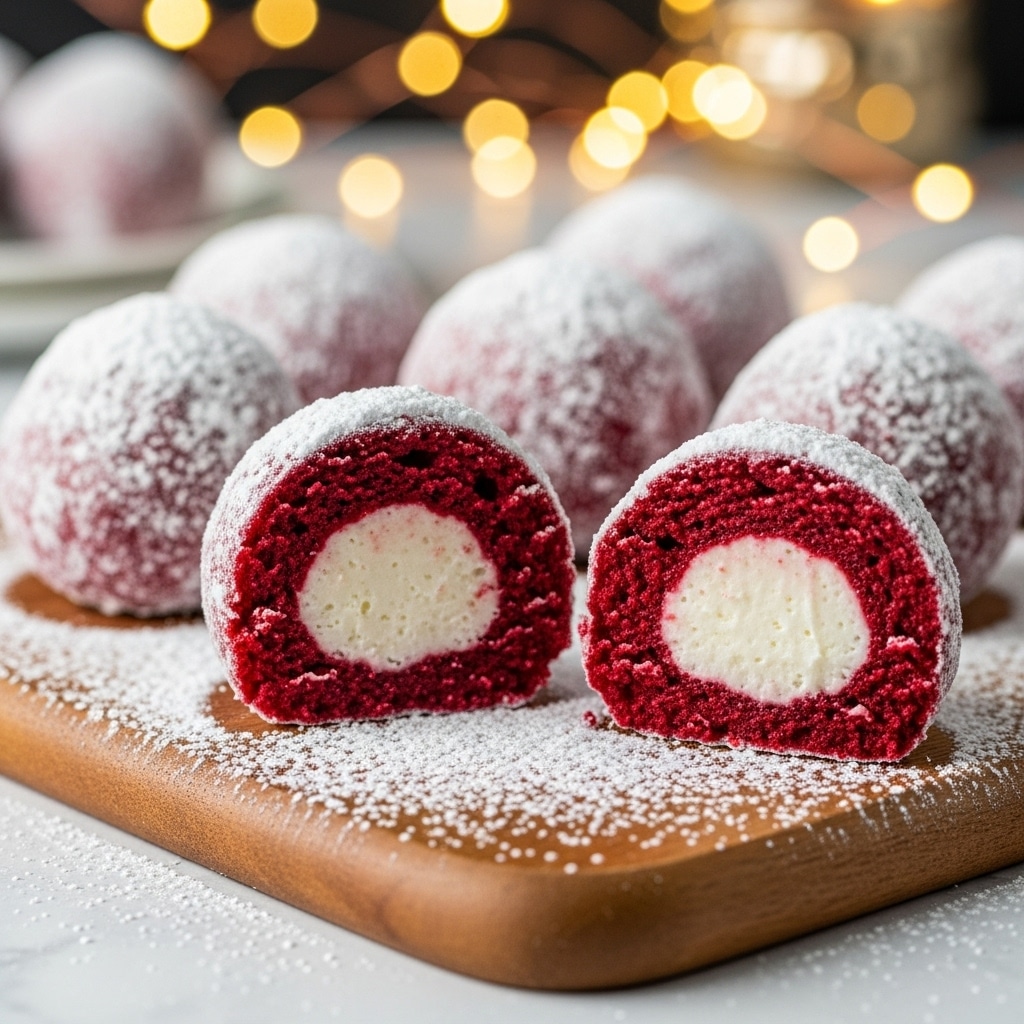
Delight in these irresistible Red Velvet Snowball Cookies filled with creamy white chocolate. Perfectly soft and festive, they bring a cozy touch to any holiday gathering with a snowy coconut coating and a luscious surprise inside.
Ingredients
- 1 ½ cups all-purpose flour (can use gluten-free flour for a gluten-free version)
- ¼ cup unsweetened cocoa powder
- 1 tsp baking powder
- ¼ tsp salt
- ½ cup unsalted butter, softened (coconut oil works for a dairy-free option)
- ¾ cup granulated sugar
- 1 large egg (use a flax egg for a vegan alternative)
- 1 tsp vanilla extract
- 1 tbsp red food coloring (gel or liquid; gel recommended for a bolder look)
- ¼ cup buttermilk (substitute with dairy-free milk plus vinegar for a non-dairy version)
- ½ cup white chocolate chips (quality chocolate recommended for best melting)
- ½ cup shredded coconut (optional, for coating)
Instructions
- Step 1: In a mixing bowl, whisk together the flour, cocoa powder, baking powder, and salt.
- Step 2: In another bowl, cream the softened butter with granulated sugar until light and fluffy.
- Step 3: Add the egg, vanilla extract, red food coloring, and buttermilk to the butter mixture and mix well.
- Step 4: Combine the wet and dry ingredients until just moist, being careful not to overmix.
- Step 5: Cover the dough and refrigerate for at least 30 minutes to firm it up for easier shaping.
- Step 6: Preheat your oven to 350°F (175°C). Line a baking sheet with parchment paper.
- Step 7: Roll the chilled dough into 1-inch balls. Use your thumb to create an indentation in the center of each ball.
- Step 8: Place a white chocolate chip inside the indentation, then pinch the dough around it to seal the filling completely.
- Step 9: Arrange the cookies on the prepared baking sheet, leaving space between each.
- Step 10: Bake for 10-12 minutes until the cookies are firm but soft to the touch.
- Step 11: Let the cookies cool on the baking sheet for 5-10 minutes. Then roll them in powdered sugar and shredded coconut for a snowy finish.
- Optional: Drizzle with melted white chocolate for an extra-special touch.
Tips & Variations
- Chill the dough before shaping to prevent sticking and keep cookies round.
- Use gel food coloring for vibrant red cookies without affecting dough texture.
- Coat cookies generously with powdered sugar and shredded coconut right after baking for the best snowball effect.
- Try different fillings like caramel or dark chocolate for a delicious twist.
- Add ½ cup finely chopped pecans or walnuts to the dough for added crunch.
- Substitute ingredients for dietary needs: gluten-free flour, coconut oil, flax egg, and dairy-free chocolate chips.
- Add a pinch of cayenne pepper for a subtle spicy kick that complements the sweetness.
Storage
Store leftover cookies in an airtight container at room temperature for up to 1 week to maintain softness. For longer storage, refrigerate for up to 2 weeks and bring to room temperature before serving. To freeze, place cookies in a single layer on a baking sheet until firm, then transfer to a freezer bag. Freeze for up to 1 month. Reheat in a 300°F (150°C) oven for 5-7 minutes for a warm, fresh-baked feel.
How to Serve

Serve this delicious recipe with your favorite sides.
FAQs
What is the best way to select ripe ingredients for Red Velvet Snowball Cookies?
Choose fresh, crack-free eggs and softened but not melted butter. Use unsweetened, richly colored cocoa powder and gel food coloring for the best results. Quality white chocolate chips make a creamy, smooth filling.
How should I store leftover Red Velvet Snowball Cookies?
Keep them in an airtight container at room temperature for up to one week. For longer storage, refrigerate up to two weeks or freeze for up to one month. Always bring refrigerated cookies back to room temperature or warm them slightly before serving.
PrintRed Velvet Snowball Cookies with White Chocolate Filling Recipe

Delight in these irresistible Red Velvet Snowball Cookies filled with creamy white chocolate, perfect for festive gatherings and holiday celebrations. These soft, chewy cookies feature a rich cocoa-infused dough, vibrant red color, and a luscious white chocolate center, all wrapped in a snowy coating of powdered sugar and shredded coconut.
- Prep Time: 30 minutes
- Cook Time: 12 minutes
- Total Time: 1 hour 12 minutes
- Yield: 24 cookies 1x
- Category: Desserts
- Method: Baking
- Cuisine: American
Ingredients
For the Cookie Dough
- 1 ½ cups all-purpose flour – Provides structure; can use gluten-free flour for gluten-free version.
- ¼ cup unsweetened cocoa powder – Adds rich chocolate flavor; ensure it’s unsweetened.
- 1 tsp baking powder – Leavening agent for perfect rise.
- ¼ tsp salt – Enhances flavor balance.
- ½ cup unsalted butter, softened – Adds richness and moisture; coconut oil works for dairy-free option.
- ¾ cup granulated sugar – Sweetens cookies and aids texture.
- 1 large egg – Binds ingredients; use flax egg for vegan alternative.
- 1 tsp vanilla extract – Adds warm flavor notes.
- 1 tbsp red food coloring (gel or liquid) – For the signature red color; gel recommended for bolder look.
- ¼ cup buttermilk – Moistens and tenderizes; substitute with dairy-free milk plus vinegar for non-dairy version.
For the Filling
- ½ cup white chocolate chips – Creamy surprise; use quality chocolate for best melting.
For Coating
- ½ cup shredded coconut – Creates snowy appearance; optional.
Instructions
- Prepare Dough: In a mixing bowl, whisk together the all-purpose flour, unsweetened cocoa powder, baking powder, and salt to combine the dry ingredients uniformly. In a separate large bowl, use a mixer to cream the softened unsalted butter with granulated sugar until the mixture is light and fluffy. Add the egg, vanilla extract, red food coloring, and buttermilk, mixing well until fully incorporated. Gradually add the dry ingredients to the wet ingredients, mixing just until moist and combined without overmixing.
- Chill Dough: Cover the dough with plastic wrap or a clean towel and refrigerate for at least 30 minutes. This chilling step firms the dough, making it easier to handle and helping the cookies retain their shape during baking.
- Shape Cookies: Remove the chilled dough and roll it into 1-inch diameter balls using your hands. Press your thumb gently into the center of each ball to create an indentation for the filling without breaking the dough through.
- Add Filling: Place one white chocolate chip inside the indentation of each dough ball. Carefully pinch the dough around the chip to enclose it entirely, sealing the filling inside to prevent leakage while baking.
- Bake: Preheat the oven to 350°F (175°C). Line a baking sheet with parchment paper. Arrange the prepared cookie balls spaced evenly apart on the sheet. Bake for 10-12 minutes, until the cookies appear set and are firm on the edges but still soft when lightly pressed.
- Cool and Coat: Let the cookies cool on the baking sheet for 5-10 minutes. While still slightly warm, roll each cookie first in powdered sugar to create a snowball effect, then coat with shredded coconut for a festive snowy finish. Optionally, drizzle with melted white chocolate for an elegant touch.
Notes
- Chill dough to prevent spreading and maintain cookie shape.
- Use gel food coloring for vibrant red hue without altering dough consistency.
- Coat cookies generously in powdered sugar and shredded coconut immediately after baking.
- Store in airtight container at room temperature for up to 1 week or refrigerate up to 2 weeks.
- Freeze shaped dough balls for up to 3 months before baking; freeze baked cookies for up to 1 month.
- Try alternative fillings such as caramel or dark chocolate for variation.
- For gluten-free options, substitute with gluten-free baking mix.
- For dairy-free options, replace butter with coconut oil and buttermilk with dairy-free milk plus vinegar.
- Vegan option: use flax egg and dairy-free chocolate chips.
Keywords: red velvet cookies, snowball cookies, white chocolate filling, festive cookies, holiday cookies, red velvet recipe