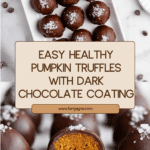
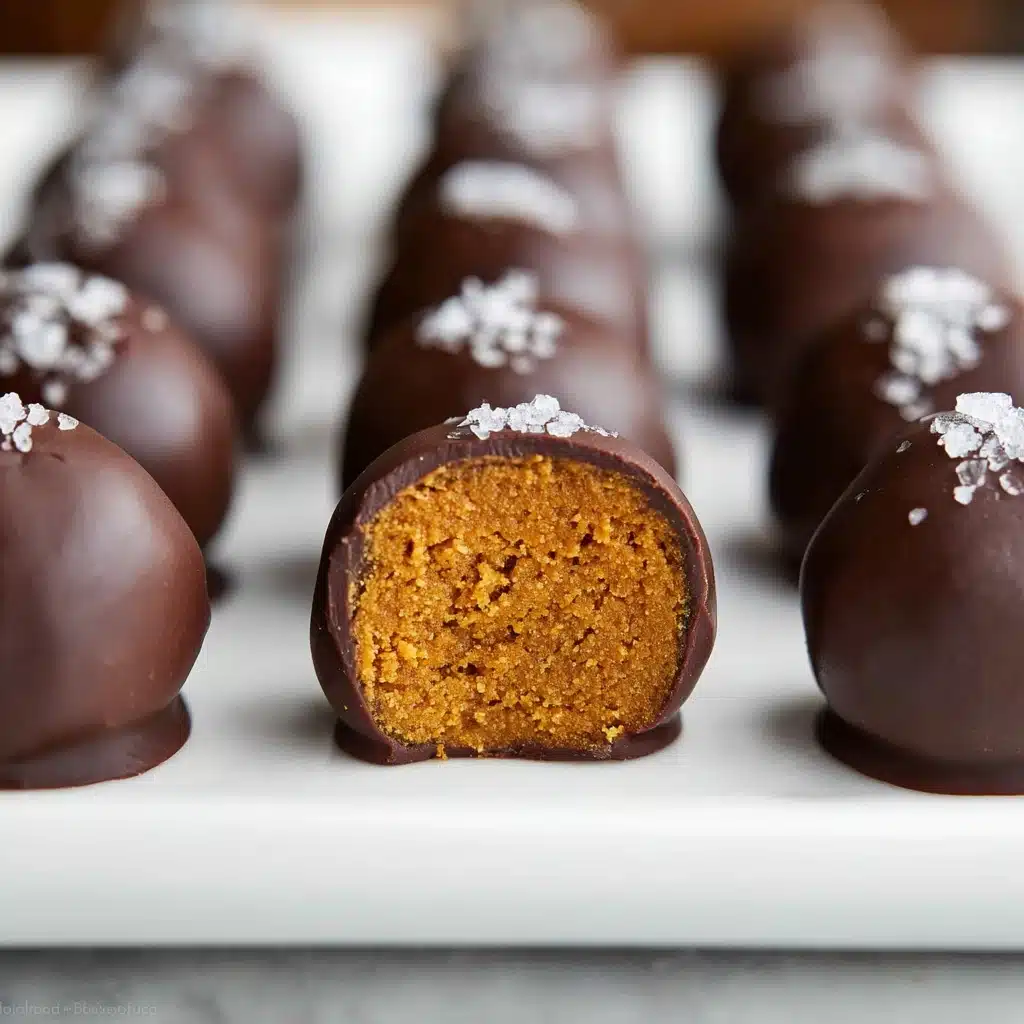
Healthy Pumpkin Truffles Recipe
If you are on the lookout for a guilt-free sweet treat that bursts with warm autumn flavors, you are going to adore these Healthy Pumpkin Truffles. These bite-sized delights combine the earthy sweetness of pumpkin purée with a cozy homemade pumpkin spice, all wrapped in rich, melted dark chocolate. Perfectly balanced between indulgence and nutrition, these truffles are a wonderful way to enjoy dessert without straying from your health goals. Whether it’s snack time, a festive gathering, or simply a cozy night in, this recipe for Healthy Pumpkin Truffles offers a luscious, wholesome experience you’ll want to share again and again.

Ingredients You’ll Need
This recipe keeps things refreshingly simple, featuring a handful of wholesome ingredients that each play a crucial role. The pumpkin purée gives moisture and subtle natural sweetness, while the oat flour lends structure and a gentle nuttiness. Homemade pumpkin spice adds the signature warming spices, and dark chocolate finishes off the truffles with a delightful contrast.
- Pumpkin purée: Use pure pumpkin purée, not pumpkin pie mix, for that rich, natural pumpkin flavor without added sugars or spices.
- Homemade pumpkin spice: A custom blend that lets you control the perfect balance of cinnamon, nutmeg, and cloves for depth and warmth.
- Salt: Just a pinch to enhance and round out the sweet and savory notes.
- Liquid stevia: A natural, zero-calorie sweetener that keeps these truffles on the healthier side but still satisfy your sweet tooth.
- Oat flour: Provides gluten-free-friendly texture and mild nuttiness; make sure to measure it by weight for accuracy.
- Dark chocolate: The star coating! Use roughly chopped high-quality dark chocolate for rich flavor and glossy finish.
- Flaky sea salt (optional): A sprinkle on top intensifies the chocolate and spice, making each bite even more irresistible.
How to Make Healthy Pumpkin Truffles
Step 1: Prepare Your Workstation
First things first, lay down a sheet of wax or parchment paper on a baking tray. This step is your foundation for easy handling and cleanup, ensuring your truffles don’t stick and stay perfectly round in shape later on.
Step 2: Mix the Pumpkin Base
In a medium bowl, combine the pumpkin purée with the homemade pumpkin spice, salt, and liquid stevia. Stir these together until everything is evenly blended. This mixture becomes the flavorful heart of your truffles, so take a moment to savor that lovely pumpkin aroma starting to build.
Step 3: Incorporate the Oat Flour
Next, add the oat flour into your pumpkin mixture. Stir gently until just incorporated. This step gives your truffles structure and helps them hold their shape. Be careful not to overmix, or you might lose some of the tender texture that makes these truffles so special.
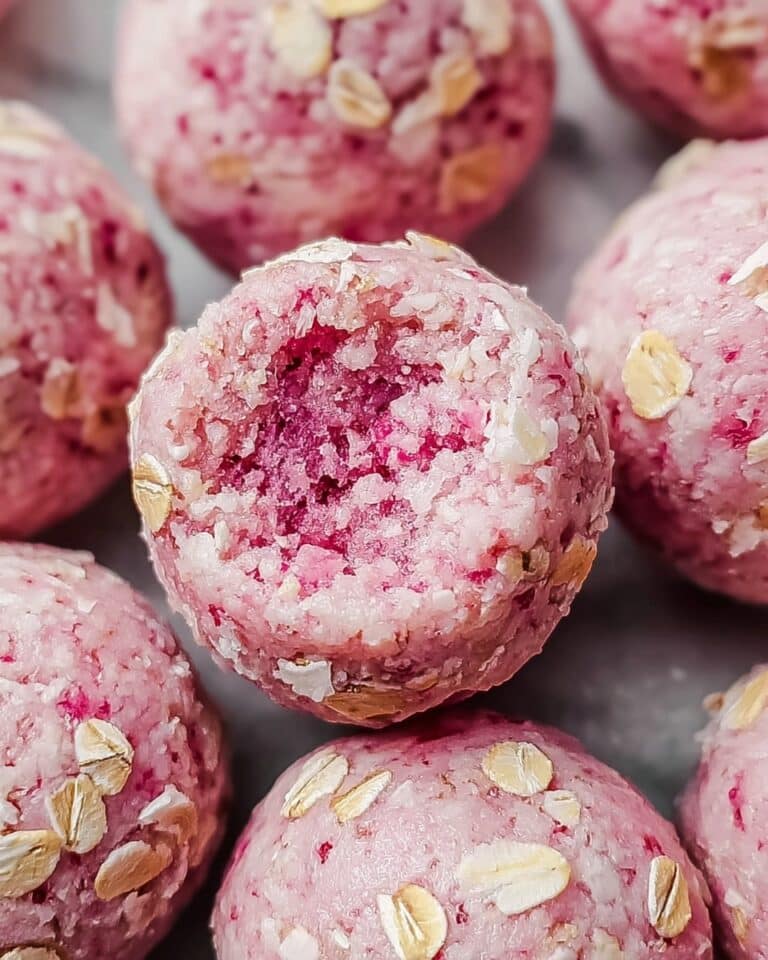
Step 4: Form Bite-Sized Spheres
Time to get your hands a little messy! Roll small portions of the mixture into bite-sized balls. If you find the mixture sticking to your fingers, just rub a tiny bit of neutral oil on your palms to smooth the process. Place each sphere on the prepared baking tray and repeat until all the mixture is used up. This is the fun part where your Healthy Pumpkin Truffles really start to take shape.
Step 5: Melt the Dark Chocolate
Place your roughly chopped dark chocolate in a microwave-safe bowl and heat it on high for 30 seconds. Stir and then continue heating in 10-second bursts, stirring in between, until the chocolate is fully melted and silky smooth. Keeping it warm as you work helps with coating each truffle evenly.
Step 6: Dip and Coat Your Truffles
Using two forks, carefully dip one pumpkin sphere at a time into the melted chocolate, rocking gently to let the excess drip off. Transfer it back onto the wax paper. For a beautiful taste and texture contrast, sprinkle a pinch of flaky sea salt on top while the chocolate is still wet. Repeat this chocolate-dipping process for every truffle, watching your batch grow.
Step 7: Chill and Set
Once coated, place the baking tray into the freezer for 5 to 10 minutes or the refrigerator for 15 to 20 minutes, allowing the chocolate shell to harden beautifully. After setting, store your Healthy Pumpkin Truffles in the fridge until you are ready to enjoy.
How to Serve Healthy Pumpkin Truffles
Garnishes
Enhance each truffle with a delicate touch by sprinkling flaky sea salt for a salty-sweet balance or a dusting of cinnamon for extra spice warmth. You could also try finely grated orange zest for a bright hint of citrus that pairs wonderfully with pumpkin and chocolate.
Side Dishes
Serve these truffles alongside a cup of hot chai tea or spiced coffee for the ultimate autumn snack experience. They also make a lovely complement to a dessert platter featuring fresh fruit, nuts, or a light yogurt dip to keep the overall presentation fresh and inviting.
Creative Ways to Present
For gatherings, place Healthy Pumpkin Truffles in pretty mini cupcake liners arranged on a wooden board or draped with seasonal greenery. Alternatively, gift them in small mason jars tied with rustic twine for a heartfelt homemade present that will impress friends and family alike.
Make Ahead and Storage
Storing Leftovers
Keep your Healthy Pumpkin Truffles refrigerated in an airtight container to maintain their freshness and texture. Stored this way, they typically stay perfect for up to one week — easy to grab whenever a pumpkin craving strikes.
Freezing
Want to make a batch ahead? These truffles freeze wonderfully. Lay them out on a tray until frozen solid, then transfer to a freezer-safe bag or container. They’ll keep well for up to 2 months without losing their delicious flavor or texture.
Reheating
Since these are best enjoyed chilled or at room temperature, reheating isn’t necessary. Simply let frozen truffles thaw in the refrigerator for a few hours or on the counter for about 15 minutes before serving to enjoy the full depth of their pumpkin and chocolate goodness.
FAQs
Can I use canned pumpkin pie filling instead of pumpkin purée?
It’s best to avoid canned pumpkin pie filling as it contains added sugars and spices that will affect the flavor and texture of your truffles. Use pure pumpkin purée for the most authentic and balanced taste in your Healthy Pumpkin Truffles.
Is it necessary to use oat flour? Can I substitute it?
Oat flour gives these truffles their perfect tender texture and mild nuttiness. You can substitute with almond flour or a gluten-free 1-to-1 baking flour, but the texture might vary slightly. Make sure to adjust quantity if using a different flour type.
How much stevia should I add for sweetness? Can I use another sweetener?
The recipe calls for ¾ teaspoon of liquid stevia, but sweetness preference can vary. Feel free to adjust to taste or substitute with honey, maple syrup, or another sweetener — just keep in mind it may alter the moisture content slightly.
What type of dark chocolate works best for coating?
Look for dark chocolate with at least 70% cocoa for a rich, less sweet coating that pairs beautifully with pumpkin’s earthiness. Higher quality chocolate also melts smoother and gives a lovely glossy finish to your truffles.
Can these truffles be made vegan or dairy-free?
Yes! The recipe is naturally dairy-free as long as you choose dark chocolate without milk solids. For a vegan-friendly option, double-check your chocolate source to ensure it’s certified vegan.
Final Thoughts
You truly can’t go wrong with these Healthy Pumpkin Truffles. They blend wholesome ingredients and comforting autumn flavors into a treat that feels both nourishing and indulgent. Whether you’re making them for yourself or as a sweet gift, these truffles bring all the cozy pumpkin goodness in an easy, elegant package. Give this recipe a try and watch how quickly they disappear — pumpkin season just found its new best friend!
PrintHealthy Pumpkin Truffles Recipe
These Healthy Pumpkin Truffles are a delicious, guilt-free treat perfect for fall or any time you crave a sweet snack. Made with real pumpkin puree, warm pumpkin spice, and rich dark chocolate, these bite-sized delights combine wholesome ingredients with just the right amount of sweetness from liquid stevia. Gluten-free and easy to make, they offer a nutritious alternative to traditional truffles without sacrificing flavor or texture.
- Prep Time: 15 minutes
- Cook Time: 10 minutes
- Total Time: 25 minutes
- Yield: Approximately 24 truffles 1x
- Category: Dessert
- Method: No-bake, Dipping
- Cuisine: American
- Diet: Gluten Free
Ingredients
Filling
- ½ cup (122g) pumpkin purée (NOT pumpkin pie mix!)
- 1 ¼ tsp homemade pumpkin spice (see Notes!)
- ⅛ tsp salt
- ¾ tsp liquid stevia (or adjusted to taste)
- ¾ cup (90g) oat flour (gluten free if necessary and measured like this)
Coating
- ¼ cup (54g) roughly chopped dark chocolate (minimum 70% cacao recommended)
- Optional: flaky sea salt (for finishing – highly recommended!)
Instructions
- Prepare baking sheet: Place a sheet of wax paper or parchment paper on a baking tray to prevent the truffles from sticking once dipped in chocolate.
- Mix filling: In a medium bowl, thoroughly stir together the pumpkin purée, homemade pumpkin spice, salt, and liquid stevia. Gradually add the oat flour and mix until just incorporated, forming a soft, workable dough.
- Form spheres: Working with small portions of the mixture at a time, roll them into bite-sized spheres using your hands. If the mixture sticks, rub your fingers and palms lightly with a neutral-tasting oil. Place each formed sphere onto the prepared baking sheet and repeat until all mixture is used.
- Melt chocolate: Place the chopped dark chocolate in a microwave-safe bowl. Heat on HIGH for 30 seconds, then stir for 1 minute. Continue heating in 10-second intervals, stirring each time for 1 minute, until the chocolate is completely melted and smooth. Keep the chocolate warm while assembling truffles to ensure easy dipping.
- Dip truffles: Using two forks, carefully dip each pumpkin sphere into the melted chocolate, rocking it between the forks to let the excess chocolate drip off. Return the coated truffle onto the wax paper-lined tray. If desired, sprinkle a small pinch of flaky sea salt on top immediately after dipping to enhance the flavor.
- Set chocolate: Once all 24 truffles are coated, place the baking tray in the freezer for 5-10 minutes or the refrigerator for 15-20 minutes until the chocolate hardens completely.
- Store and serve: Keep the truffles refrigerated until ready to enjoy. They are best consumed within a week for optimal freshness and flavor.
Notes
- Homemade pumpkin spice typically includes a blend of cinnamon, nutmeg, ginger, and cloves; adjust proportions according to taste.
- Use pure pumpkin purée, not pumpkin pie filling, which contains added sugars and spices.
- Choose high-quality dark chocolate with at least 70% cacao for best taste and health benefits.
- If your hands stick when rolling balls, use a small amount of neutral oil like grapeseed or avocado oil to prevent mess.
- Keep the melted chocolate warm but not hot to avoid hardening or separation during dipping.
- Flaky sea salt sprinkled on top balances the sweetness and enhances the pumpkin flavor.
- Store truffles refrigerated in an airtight container; they can be frozen for longer storage up to 1 month.
Nutrition
- Serving Size: 2 truffles (approx. 30g)
- Calories: 90
- Sugar: 1g
- Sodium: 40mg
- Fat: 6g
- Saturated Fat: 3.5g
- Unsaturated Fat: 2g
- Trans Fat: 0g
- Carbohydrates: 9g
- Fiber: 2g
- Protein: 2g
- Cholesterol: 0mg
Keywords: pumpkin truffles, healthy pumpkin dessert, gluten free truffles, no bake pumpkin treats, pumpkin spice dessert, stevia sweetened truffles