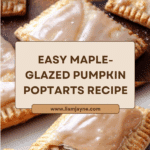
Maple-Glazed Pumpkin Recipe
Introduction
These Maple-Glazed Pumpkin pastries offer a delightful twist on a classic treat, combining the cozy flavors of pumpkin and warm spices with a sweet maple glaze. Perfect for autumn mornings or a tasty snack, they are easy to prepare and irresistibly delicious.
Ingredients
- 1 refrigerated pie crust roll (found near the refrigerated biscuits)
- 1/2 cup canned pumpkin
- 1/3 cup brown sugar (packed)
- 1/2 tsp. maple flavoring
- 1/4 tsp. pumpkin pie spice
- Dash of salt
- 1/2 cup powdered sugar
- 1/4 tsp. maple flavoring
- 1 Tbsp. milk
Instructions
- Step 1: Preheat your oven to 375ºF.
- Step 2: In a medium bowl, combine the canned pumpkin, brown sugar, 1/2 teaspoon maple flavoring, pumpkin pie spice, and a dash of salt. Mix thoroughly and set aside.
- Step 3: Unroll the pie crust onto a floured surface. Using a rolling pin, roll it into a thin rectangle measuring approximately 6 by 22 inches. Cut the dough into 8 even rectangles.
- Step 4: Place one rectangle on a baking sheet and spoon a generous dollop of the pumpkin mixture into its center, leaving enough room around the edges for sealing.
- Step 5: Place another rectangle of pie crust on top of the filled one and press down gently around the edges to seal.
- Step 6: Use a fork to crimp the edges by pressing the fork’s tines about 1/2 inch from the edge, creating a decorative and secure seal.
- Step 7: Repeat the filling and sealing process with the remaining rectangles to make four pastries in total.
- Step 8: Bake the pastries for 9 to 11 minutes or until their edges turn lightly golden brown.
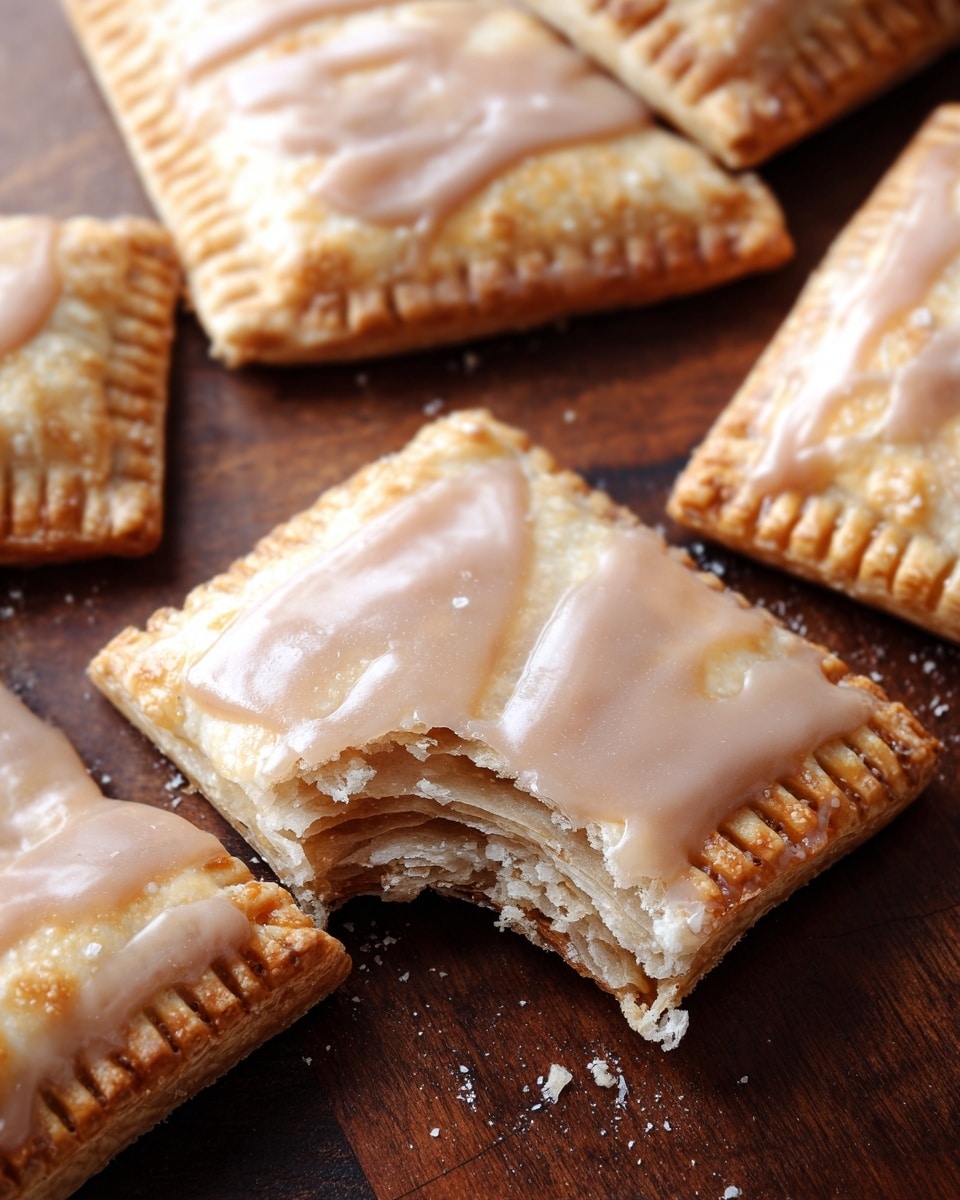
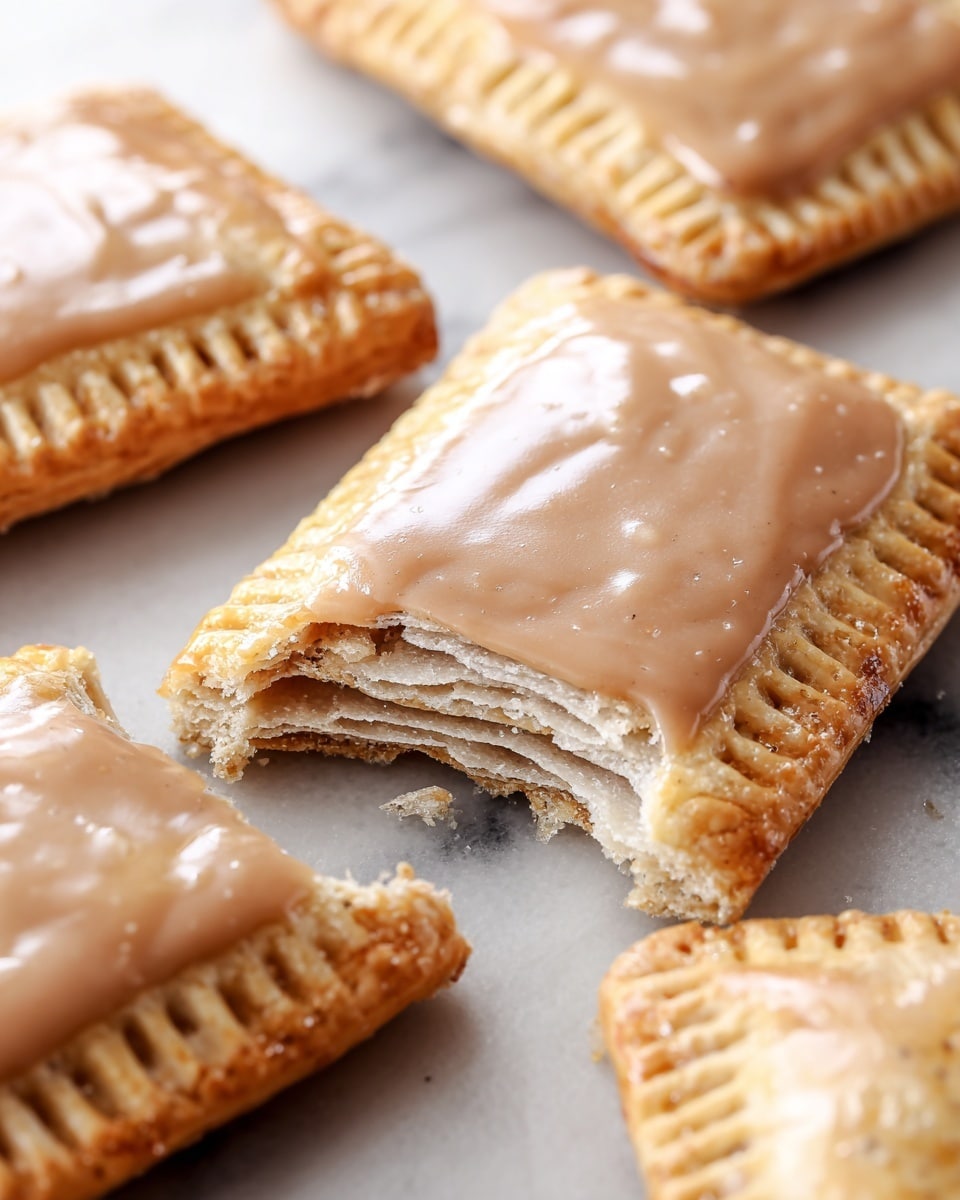
- Step 9: While the pastries cool, prepare the glaze by mixing powdered sugar, 1/4 teaspoon maple flavoring, and milk in a small bowl until smooth. Drizzle the glaze over the cooled pastries and let it harden before serving.
Tips & Variations
- For extra flavor, add a pinch of cinnamon or nutmeg to the pumpkin filling.
- Substitute pure maple syrup for the maple flavoring in the glaze for a more natural taste.
- Use a pie crust with butter for a richer, flakier pastry texture.
- Try adding chopped nuts like pecans or walnuts inside the filling for crunch.
Storage
Store the maple-glazed pumpkin pastries in an airtight container at room temperature for up to 2 days. For longer storage, refrigerate them for up to 5 days. Reheat gently in a toaster oven or microwave before glazing, or enjoy cold if preferred. The glaze is best applied fresh, but leftovers can be glazed just before serving.
How to Serve
Serve this delicious recipe with your favorite sides.
FAQs
Can I use homemade pie crust instead of refrigerated?
Absolutely! Homemade pie crust works well and can add extra flavor and flakiness. Just roll it out to the same dimensions before assembling.
Is canned pumpkin the same as pumpkin pie filling?
No, canned pumpkin is pure pumpkin puree without added spices or sweeteners, while pumpkin pie filling includes those ingredients. Be sure to use canned pumpkin for this recipe to control the seasoning and sweetness.
PrintMaple-Glazed Pumpkin Recipe
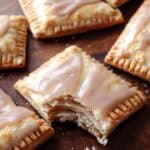
These Maple-Glazed Pumpkin Pop-Tarts are a delightful fall treat featuring a flaky pie crust filled with a spiced pumpkin blend and topped with a sweet maple glaze. Perfect for a cozy breakfast or snack, these homemade pop-tarts combine classic autumn flavors in a fun, handheld pastry.
- Prep Time: 15 minutes
- Cook Time: 10 minutes
- Total Time: 25 minutes
- Yield: 4 pop-tarts 1x
- Category: Dessert
- Method: Baking
- Cuisine: American
Ingredients
Pie Crust
- 1 refrigerated pie crust roll (found near refrigerated biscuits)
Pumpkin Filling
- 1/2 cup canned pumpkin
- 1/3 cup brown sugar (packed)
- 1/2 tsp maple flavoring
- 1/4 tsp pumpkin pie spice
- Dash of salt
Maple Glaze
- 1/2 cup powdered sugar
- 1/4 tsp maple flavoring
- 1 Tbsp milk
Instructions
- Preheat Oven: Preheat your oven to 375°F to ensure it’s ready for baking the pop-tarts.
- Prepare Pumpkin Filling: In a medium bowl, thoroughly combine the canned pumpkin, packed brown sugar, maple flavoring, pumpkin pie spice, and a dash of salt. Mix until fully blended and set the mixture aside.
- Roll Out Pie Crust: Turn the refrigerated pie crust out onto a floured surface. Using a rolling pin, roll the crust into a thin rectangle measuring approximately 6 by 22 inches for even pop-tart size.
- Cut Crust Rectangles: Cut the rolled-out dough into 8 even rectangles to form the base and tops for your pop-tarts.
- Assemble Pop-Tarts: Place one rectangle on a baking sheet. Spoon a generous dollop of the pumpkin filling into the center, leaving enough space around the edges for sealing.
- Seal Edges: Top with a second rectangle of pie crust and press the edges together firmly to seal.
- Crimp Edges: Use a fork to crimp all around the edges approximately 1/2 inch from the edge of the pop-tart. This ensures a secure seal and adds detail.
- Repeat Assembly: Repeat the filling, topping, pressing, and crimping process for the remaining four pop-tarts.
- Bake Pop-Tarts: Bake in the preheated oven for 9-11 minutes or until the edges turn a light golden brown.
- Prepare Maple Glaze: While the pop-tarts bake, whisk together powdered sugar, maple flavoring, and milk in a small bowl until smooth.
- Glaze Pop-Tarts: After baking, allow the pop-tarts to cool completely. Then spoon the maple glaze over the tops and let it harden before serving. Enjoy your warm, delicious maple-glazed pumpkin pop-tarts!
Notes
- Ensure the edges are sealed well to prevent filling from leaking during baking.
- You can substitute pure maple syrup for maple flavoring if preferred, adjusting quantity to taste.
- For crispier crust, roll the dough thinner but be careful not to make it too flimsy.
- Allow glaze to harden completely to avoid stickiness when eating.
- Store leftovers in an airtight container at room temperature for up to 2 days or freeze for longer storage.
Keywords: pumpkin pop-tarts, maple glazed pop-tarts, fall dessert, homemade pop-tarts, pumpkin pastry, autumn recipes