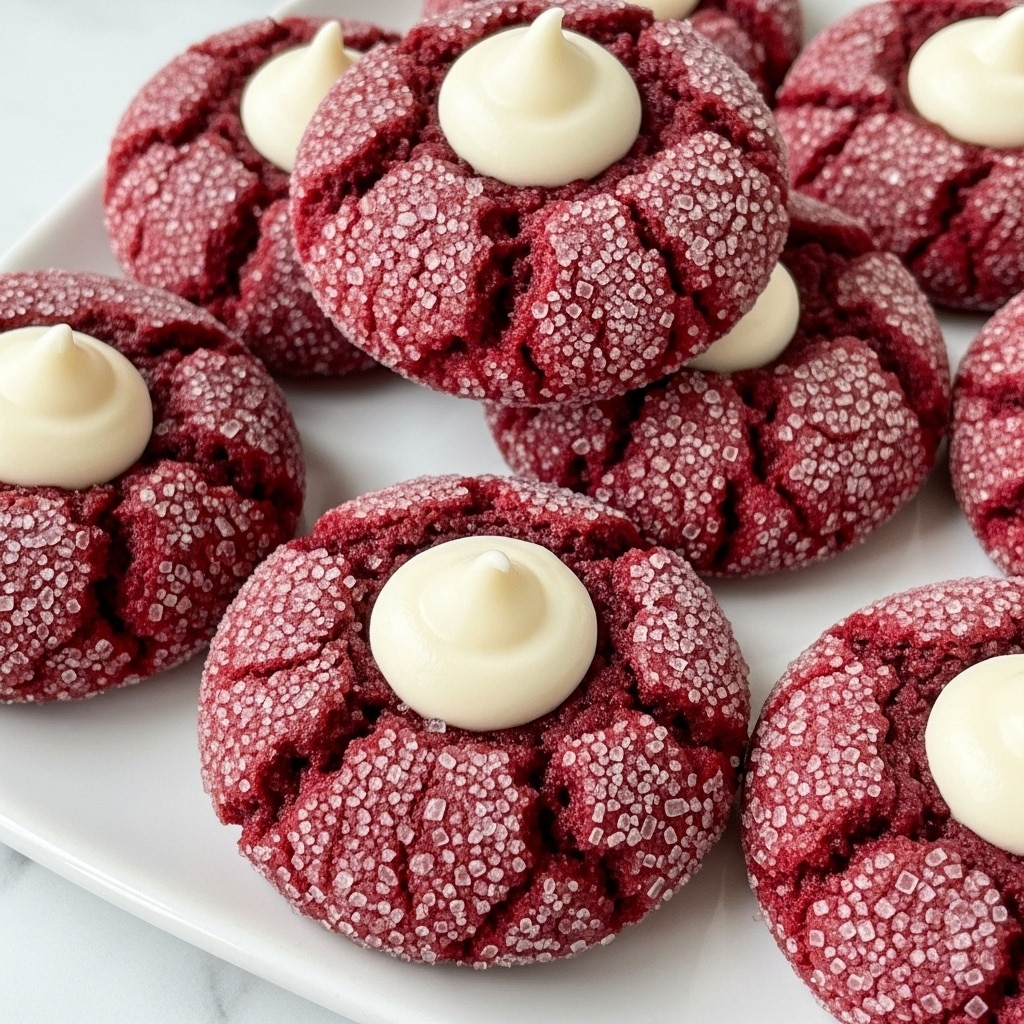
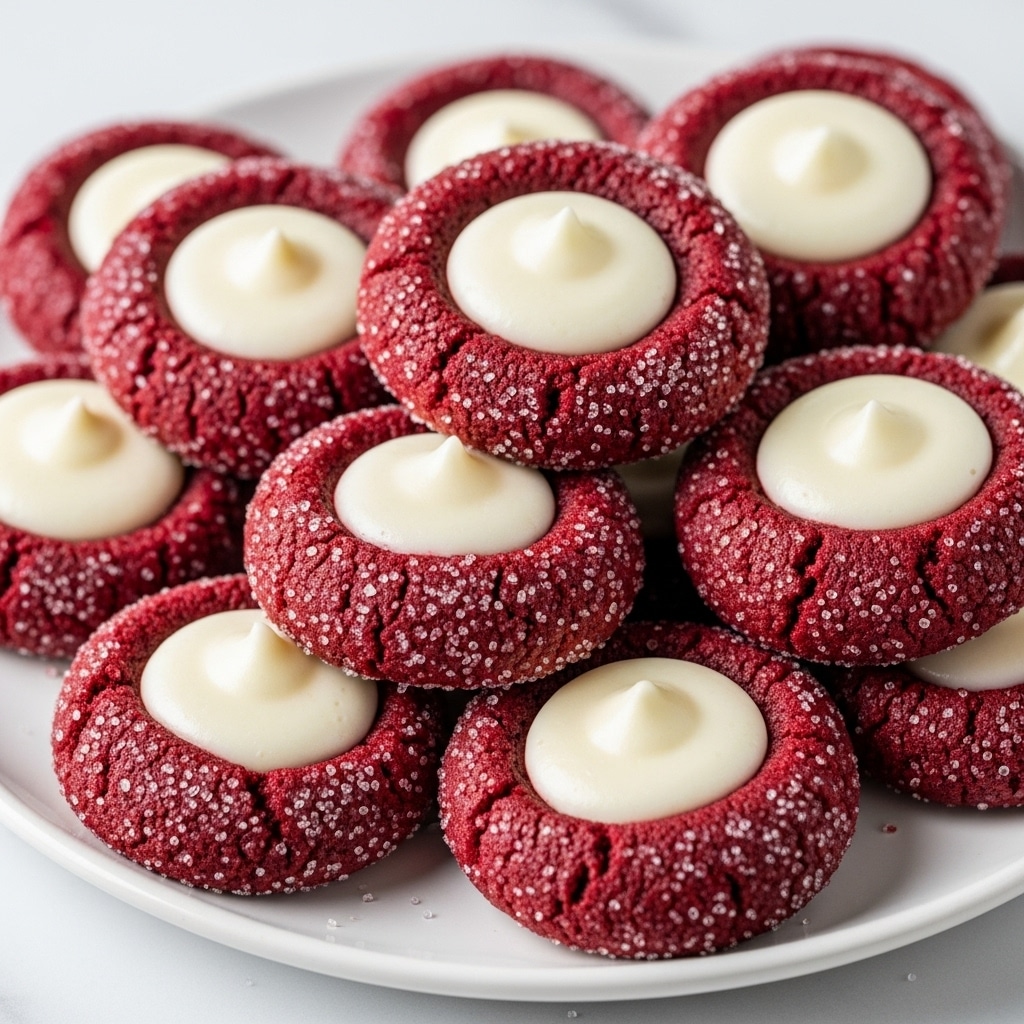
Red Velvet Cream Cheese Thumbprint Cookies Recipe
Introduction
Discover the charm of Red Velvet Cream Cheese Thumbprint Cookies — a festive twist on classic thumbprint cookies. These vibrant red treats combine a tender cocoa-infused cookie with a luscious, tangy cream cheese filling, perfect for holidays or any special occasion.
Ingredients
- 2 ½ cups (300g) all-purpose flour
- 2 tablespoons (14g) unsweetened natural cocoa powder
- 1 teaspoon baking soda
- ½ teaspoon salt
- 1 cup (226g) unsalted butter, softened (for dough)
- 1 ½ cups (300g) granulated sugar
- 1 large egg, room temperature
- 1 teaspoon vanilla extract (for dough)
- 1 tablespoon (15ml) white vinegar (for dough)
- ½ cup (120ml) buttermilk (or homemade with lemon juice or vinegar)
- 1-2 ounces (30-60ml) red gel food coloring
- 8 ounces (226g) full-fat cream cheese, softened (for filling)
- ½ cup (113g) unsalted butter, softened (for filling)
- 3-4 cups (360-480g) powdered sugar, sifted
- 1 teaspoon vanilla extract (for filling)
- Pinch of salt (for filling)
- Optional: Additional powdered sugar for dusting
- Optional: Melted white chocolate for drizzling
Instructions
- Step 1: Preheat your oven to 375°F (190°C). Line several baking sheets with parchment paper or silicone baking mats to prevent sticking and ease cleanup.
- Step 2: In a medium bowl, whisk together the flour, cocoa powder, baking soda, and salt. Set this dry mixture aside.
- Step 3: In a stand mixer, cream the softened butter and granulated sugar on medium-high speed until light and fluffy, about 3-5 minutes.
- Step 4: Add the egg, vanilla extract, and white vinegar to the butter mixture. Beat on medium speed until just combined, scraping down the bowl as needed.
- Step 5: Mix in 1-2 ounces of red gel food coloring until the dough turns a vibrant red.
- Step 6: Add the dry ingredients in three parts, alternating with two additions of buttermilk. Mix on low speed just until flour streaks disappear to avoid overmixing.
- Step 7: Scrape the dough into a ball, cover tightly with plastic wrap, and chill in the refrigerator for at least 30 minutes or up to 2 hours.
- Step 8: Meanwhile, beat the softened cream cheese and butter on medium speed until smooth and creamy, 2-3 minutes.
- Step 9: Gradually add sifted powdered sugar, one cup at a time, mixing on low speed until combined after each addition. Then, beat on medium-high for 2-3 minutes until fluffy.
- Step 10: Stir in vanilla extract and a pinch of salt until well blended.
- Step 11: Transfer the cream cheese filling to a piping bag with a small round tip or a snipped plastic bag corner. Chill for 15-20 minutes if needed to firm up.
- Step 12: Remove dough from the fridge. Using a 1.5 tablespoon cookie scoop or your hands, form uniform balls and place them on baking sheets 2 inches apart.
- Step 13: Press an indentation into the center of each dough ball using your thumb or the back of a rounded spoon.
- Step 14: Pipe or spoon a generous amount of cream cheese filling into each indentation.
- Step 15: Bake for 10-12 minutes at 375°F (190°C), until edges are set and cream cheese filling is slightly puffed and set.
- Step 16: Let the cookies cool on the baking sheets for 5-7 minutes to firm up.
- Step 17: Transfer cookies to a wire rack to cool completely, ensuring the filling sets properly.
- Step 18: Once cooled, optionally dust with powdered sugar or drizzle with melted white chocolate for a beautiful finish.
- Step 19: Store cookies in an airtight container in the refrigerator for 3-5 days, or freeze for 2-3 months with parchment paper between layers. Thaw at room temperature before serving.
Tips & Variations
- Use gel food coloring for vibrant red without adding extra liquid to the dough.
- For a citrusy twist, add lemon zest to the cream cheese filling.
- Try swapping the filling for raspberry jam or chocolate ganache for added variety.
- Add a pinch of peppermint extract to the dough for festive holiday flavor.
- If edges crack when making the thumbprint, gently smooth them with your fingers before filling.
- Chilling the dough is essential to prevent spreading and maintain the cookie shape.
Storage
Because of the cream cheese filling, store these cookies in an airtight container in the refrigerator for up to 3-5 days. For longer storage, freeze them for 2-3 months, layering parchment paper between cookies. Thaw at room temperature before serving or enjoy chilled straight from the fridge for a delightful texture contrast.
How to Serve
Serve this delicious recipe with your favorite sides.
FAQs
Can I use regular milk instead of buttermilk?
Yes, you can make homemade buttermilk by adding ½ tablespoon of lemon juice or white vinegar to ½ cup of regular milk and letting it sit for 5 minutes before using.
Why is chilling the dough important?
Chilling firms up the dough, making it easier to shape and helping the cookies hold their shape during baking, preventing excessive spreading.
PrintRed Velvet Cream Cheese Thumbprint Cookies Recipe

Delight in these mouthwatering Red Velvet Cream Cheese Thumbprint Cookies, featuring a tender red velvet cookie base with a luscious, tangy cream cheese filling. Perfect for holiday gatherings or any special occasion, these festive cookies showcase a vibrant red color paired with a smooth, creamy center that melts in your mouth. With a balance of rich cocoa and classic flavors, these thumbprint cookies offer an elegant twist on a beloved classic dessert.
- Prep Time: 45 Minutes
- Cook Time: 12 Minutes
- Total Time: 57 Minutes
- Yield: 36 cookies 1x
- Category: Dessert
- Method: Baking
- Cuisine: American
Ingredients
For the Red Velvet Cookie Dough:
- 2 ½ cups (300g) all-purpose flour
- 2 tablespoons (14g) unsweetened natural cocoa powder
- 1 teaspoon baking soda
- ½ teaspoon salt
- 1 cup (226g) unsalted butter, softened to room temperature
- 1 ½ cups (300g) granulated sugar
- 1 large egg, room temperature
- 1 teaspoon vanilla extract
- 1 tablespoon (15ml) white vinegar
- ½ cup (120ml) buttermilk (or homemade by adding ½ tablespoon lemon juice or white vinegar to milk and letting sit 5 minutes)
- 1–2 ounces (30-60ml) red gel food coloring
For the Cream Cheese Filling:
- 8 ounces (226g) full-fat cream cheese, softened to room temperature
- ½ cup (113g) unsalted butter, softened to room temperature
- 3–4 cups (360-480g) powdered sugar, sifted
- 1 teaspoon vanilla extract
- Pinch of salt
Optional Garnishes:
- Additional powdered sugar for dusting
- Melted white chocolate for drizzling
Instructions
- Preheat and Prepare Baking Sheets: Preheat your oven to 375°F (190°C) and line baking sheets with parchment paper or silicone baking mats to ensure easy cleanup and prevent sticking.
- Mix Dry Ingredients: In a medium bowl, whisk together all-purpose flour, unsweetened natural cocoa powder, baking soda, and salt until evenly combined. Set aside.
- Cream Butter and Sugar: Using a stand mixer with paddle attachment or an electric hand mixer, beat softened unsalted butter and granulated sugar at medium-high speed for 3-5 minutes until the mixture is light, fluffy, and pale in color.
- Add Wet Ingredients: Add the egg, vanilla extract, and white vinegar to the butter mixture. Beat on medium speed until just combined, scraping down the sides as needed to fully incorporate.
- Add Food Coloring: Mix in 1-2 ounces of red gel food coloring until dough takes on a vibrant deep red hue, adding more if a stronger color is desired.
- Alternate Adding Dry Ingredients and Buttermilk: Add the dry mixture in three parts, alternating with two additions of buttermilk, mixing on low speed just until flour streaks disappear to avoid overmixing and ensure tender cookies.
- Chill the Dough: Form the dough into a ball, cover tightly with plastic wrap, and refrigerate for at least 30 minutes or up to 2 hours to firm it up for easier handling and to prevent spreading during baking.
- Prepare Cream Cheese Filling: In a clean mixer bowl, beat softened cream cheese and unsalted butter on medium speed for 2-3 minutes until smooth and creamy, scraping the bowl as needed.
- Add Powdered Sugar: Gradually mix in sifted powdered sugar one cup at a time on low speed until incorporated, then increase speed to medium-high and beat for 2-3 minutes until light and fluffy.
- Flavor Filling: Stir in vanilla extract and a pinch of salt, mixing gently to combine.
- Transfer Filling to Piping Bag: Spoon filling into a piping bag fitted with a small round tip or a Ziploc bag with a snipped corner. Refrigerate 15-20 minutes if needed to firm for piping.
- Form Dough Balls: Remove dough from fridge and using a 1.5 tablespoon cookie scoop or hands, form uniform balls about 30g each. Place 2 inches apart on prepared baking sheets.
- Create Thumbprints: Gently press an indentation into the center of each dough ball using your thumb or back of a rounded spoon, creating wells for the filling without breaking through the bottom.
- Fill Centers: Pipe or spoon a generous amount of cream cheese filling into each indentation.
- Bake Cookies: Bake in the preheated oven at 375°F (190°C) for 10-12 minutes, until edges are set and cream cheese filling appears set and slightly puffed.
- Initial Cooling: Remove baking sheets from oven and let cookies cool on the sheets for 5-7 minutes to firm up and prevent breakage.
- Cool Completely: Transfer cookies to a wire rack to cool fully, allowing the cream cheese filling to set and prevent sogginess.
- Add Finishing Touches: Once cooled, dust with additional powdered sugar or drizzle with melted white chocolate for an elegant presentation.
- Storage: Store cookies in an airtight container in the refrigerator for 3-5 days due to the cream cheese filling, or freeze for 2-3 months, separating layers with parchment paper. Thaw at room temperature before serving.
Notes
- Use gel food coloring for the most vibrant red velvet color without altering dough consistency.
- Chilling the dough is essential to prevent spreading and for cleaner thumbprint indentations.
- Be careful not to overmix after adding flour to maintain tender cookies.
- Cream cheese and butter must be at room temperature for smooth filling without lumps.
- You can add zest or extracts to the cream cheese filling for flavor variations (e.g., lemon, almond, peppermint).
- Cookies should be refrigerated due to the cream cheese filling to ensure freshness and safety.
- Freeze batches in airtight containers layered with parchment paper for longer storage.
- For a festive touch, drizzle with melted white chocolate or dust with powdered sugar before serving.
Keywords: Red Velvet Cookies, Cream Cheese Filling, Thumbprint Cookies, Holiday Cookies, Festive Desserts, Baking Recipes